*******
"When you recover or discover something that nourishes your soul or brings joy,
care enough about yourself to make room for it in your life."
Jean Shinoda Bolen
*******
Showing posts with label Everything but Cards. Show all posts

March 4, 2013

Wedding
On to the Kids!

There are so many kids in the wedding and attending the wedding that I decided they needed something to take home with them, too!  I didn't use the wedding colors for these party favors, but I think I made enough!  The pillow boxes are for the teenagers, and the milk cartons are for the little kids.


Milk Cartons:  These milk cartons are not made with a die. Click HERE for the video for construction of the 2-part origami-folded milk carton boxes - they're fairly easy and so much fun to make! 

I used white copy paper for the bottoms of the milk cartons (these are made in 4 parts and the copy paper was plenty thick once folded) and a variety of decorative paper (DCWV) for the milk carton tops. I used the rounded tab punch from SU for the name tags.

Pillow Boxes:  The pillow boxes were made using the blackout feature on the Cricut Wedding Solutions cartridge & I inked the edges with distress ink that coordinated with the paper.  I used the new Petite Curly Label punch from SU for the name tags.

 For the pillow boxes, I used white cardstock (Michael's) and a variety of decorative paper (DCWV).

March 3, 2013

Wedding Favors

My step-daughter is getting married and won't be having a reception, so no printed napkins or anything for the wedding guests to take home with them.  I decided to make just a little something for each guest. 

These are the rosette magnets and boxes I made for my dear step-daughter & future step-son:


The wedding colors are royal blue and white, so I printed the sentiment with my MS Word program using the WordArt, and the "A Gift for You" was also printed using MS Word. The banners were actually hand cut to form around the WordArt. I made sure "A Gift for You" fit inside one of the stamps in SU's Four Frames stamp set, then I punched out the stamped image with the coordinating punch. I inked everything with Chipped Sapphire Distress Ink, including the hearts on the rosette (cut with the Cricut and Wedding Solutions cartridge).  The rosette is the larger of the two on the Mini Rosettes Decorative Strip Die (Tim Holtz/Sizzix).


March 2, 2013

Briefcase

Needing something to hold an ornament and card for our grandsons at Christmas, I designed and created briefcases for them.  Here is just one of them:


Supplies:

Night of Navy, Cajon Craze, Marina Mist CS (SU)
Decorative Paper (unknown)
Night of Navy marker for stitching (SU)
Brads for handles (JoAnn's)
White Crochet Thread for tag
Tag Punch (EKSuccess)
1-1/4" Square Punch (SU)
Fastener Tab for closure (TomBow)

March 1, 2013

Purses

With 13 grandkids, I'm always trying to come up with new ideas for a little extra surprise.  We give each of the grandkids a gift card at Christmas and the last two years, an ornament for each of them.  This year, I was working on something to put a card and ornament in for each of them.  This sure saves me gift wrapping time!  Tomorrow I will post the briefcases I designed and create for the grandsons.

These are the purses I designed and created for each of the girls:


I used a variety of cardstock and decorative paper.  Some of the purses have rosette flowers and some have flowers using the Tim Holtz/Sizzix Movers and Shapers Tattered Flowers die.  I like the Movers and Shapers dies because the images are smaller than those on the on the Bigz dies.

Supplies:

White & Daffodil Delight Cardstock (Michael's and SU)
Paper (DCWV)
Ink (for edges & flowers) (SU)
Mini Rosette Die (Tim Holtz/Sizzix)
Tatter Flowers Movers & Shapers Die (Tim Holtz/Sizzix)
1" White Satin Ribbon (Offray)
3/4" Sheer White Ribbon (Offray)
Buttons (from my stash)
Paper flower centers: Candi Dots
Stickles glitter glue (Ranger)
Border Punch (EKSuccess)
Brads (handles) (JoAnn's)
Fastener Tab for closure (TomBow)

February 28, 2013

Party Favors
Boxes & Rosette Magnets

Although recovery from my back surgery is not going as planned (does it ever?), I have been able to get into my craft room for some fun. 

The minister's wife asked for help and I said yes!  She has a daughter's wedding in a few months, a Women's Ministry meeting in April, and a girls' group luncheon in May, all requiring "something!"  Wedding invitations: Done!  Party favors for dinner: Done!  Next project: 35 mini albums for the girls.

Below are the little boxes and rosette magnets I made as party favors (100 of each!).  Original box designed by Carin Curtis.  I stamped and hand cut 300 cowboy boots to fit into the theme of the meeting.  Details are below the pictures. (Sorry for the poor quality of the pictures.)


Supplies:
Kraft & Cream cardstock (Michael's)
Early Espresso cardstock (SU)
Genuine Country stamp set (CTMH) (box border)
Cowboy boot stamp (Ann-ticipations)
Rosette (Mini) Decorative Strip Die (Tim Holtz/Sizzix)
Espresso ink pad (Ranger)
Raffia (Good Times)
Magnets (Darice)

HERE IS A LINK FOR THE BOX CONSTRUCTION.

December 11, 2012

Rosette Snowman

My back is still giving me major fits and I'm still not scheduled for surgery.  This is the only thing I've made recently and it took me many days to put together since I can't sit for long periods of time! 

I found the pattern for the snowman HERE at the Archiver's website.  It's not as hard as it looks!  I spent more time trying to quill strips bigger then 1/4" than making the actual snowman!  The photo doesn't show it, but the entire snowman is covered in fairy dust glitter (JoAnn's)!!!  See changes and additions I made to the pattern below the photo.


Changes to pattern: 

First, for the actual snowman, I used 11" strips of white cardstock rather than  the 12" strips because I always have an abundance of 8-1/2" x 11" cardstock!  I also used 2-1/2" circles of cardstock for the larger rosettes instead of the 1-3/8" circles in the pattern on both sides of the rosette.  the larger cirlces made the rosettes much more stable.  I used wide Scor-tape to attached the circles.  Before attaching the second circle on the rosette, I used hot glue in the centers of the rosettes.  (If you don't have a 2-1/2" circle punch or a Cricut to cut the circles, just use something like a pint canning jar and trace circles.)  I also added 2 circles of cardstock between each rosette to add space between rosettes that were similar in size.

At the top of his head, I added a 1-3/4" rosette because it was too much of a ridge. 

I also made a much large pipe.  I used a 3/4" strip of craft cardstock and sponges it with Vintage photo distress ink (Ranger/Tim Holtz), rolled it and then pull it out just like his carrot nose.  Then I used the original piece for the pipe and glued a 3/4" strip around it for a higher bowl for the pipe.  Again, I sponge Vintage Photo distress ink on the bowl.

I also used two 3" circles of black cardstock and a 1" strip to make the brim of the hat.  Score 3/8" along both long edges of the 1" strip and cut triangles out of the 3/8" edges.  Fold on the score lines.  apply glue and wrap along outer edges of the large cardstock circles.  tada!  You have a hat brim!  I used hot glue to attached the cylinder to the brim (I used the measurement for the cylinder in the directions) and also to attach the top of the hat (1-7/8" circle of black cardstock) to the cylinder.  I then added three little stars made with the merry minis punch (SU) & gold embossing powder.  I also used a piece of gold plastic canvas cord (Darice) for the hat decoration. 

Finally, I added a double wrap of a knitted I-cord made from dark purple regular yarn for his scarf (the "1/4" sweater trim" on page 11 of the SU Holiday mini is actually I-cord!).

HERE is a video on how to make knitted I-cord (just use a tapestry needle to thread in the ends of your yarn).

HERE is a video for a crocheted I-cord (again just use a tapestry needle to thread in the ends of your yarn).

September 27, 2012

3"x3" Envelopes

This is sort of a long post....

I very often need to make 3" x 3" square envelopes for all of our 13 grandkids' cards.  Decorative paper can be costly and I rarely find anything in my stash I'm willing to use for envelopes.  I also don't like using copy paper for the envelopes. 

I've always believed in supporting small town businesses to keep their doors open, and the folks at our small town newspaper, the Pioneer Press, go out of their way to keep their office supplies reasonably priced.   After figuring in the cost of gas for my car, I now buy all my A2 envelopes and printer cartridges from them much cheaper than at the big box stores (and it's a drive of a few blocks rather than 225 miles!). 

So, I asked Thomas at the Pioneer Press office if they sold paper heavier than copy paper.  He pulled out a package of 24 lb. paper.  I bought some to try it.  When I got home, I discovered that 24 lb paper is bond paper, which we used as our letterhead paper in the law offices!  It cut, scored and folded perfectly!  So, I now have the perfect paper for envelopes.  The 3" square envelopes ended up costing me 5 cents each (2 envelopes per sheet).

So, if you have to make small envelopes and prefer a nicer paper, try bond paper!

Thank you to Thomas and Dawn at the Pioneer Press office for always going out of their way to make my crafting affordable!

August 18, 2012

Ornament #7
Pink & Lime

Happy Birthday Jeanne!

This ornament is for my favorite sister.  Okay, so she's my only sister!  I couldn't ask for a better sister, she's just such an amazing, loving, caring woman.  True story:  My sister, Jeanne, is 6 years older than me, and when we were kids, if my sister was angry with me about something (I was a real pest, apparently) she would threaten to cut off my eyelashes when I was asleep!  Really she did.  She has blond hair and short eyelashes, I have dark hair and very long eyelashes, so that was her threat, to cut off my eyelashes! (She never did cut them short!)  Today, of course, we laugh about it and although she still issues that threat as a joke, I do live clear across the country so I think my eyelashes are safe!  Jeanne's craft studio is pink, lime, and black so I made this ornament just for her.

Supplies:
Holiday Ornaments framelits dies (SU)
Ornament Keepsakes stamp set (SU)
White cardstock
Green Galore & Pink Passion ink pads (SU)
Rosette Die (Tim Holtz/Sizzix)
Magenta Stickles (Ranger)
Crochet thread with silver threading (Lily)
Rhinestone (Michael's)

August 17, 2012

Ornament #6
Christmas Stripes

This ornament is made entirely out of paper with no stamping.  I really like the striped paper and had just enough left over to make an ornament.
Supplies:
Decorative Paper (DCWV & Cloud 9 Designs)
Ornament framelits dies (SU)
Gold Crochet Thread with gold threading (Lily)
Gold Stickles
Rosette Die (Tim Holtz/Sizzix)
Rose Button (Streamline)

August 16, 2012

Ornament #5
Snowflakes

Of course, I had to make a blue ornament with snowflakes!  Thank you to Pam, my SU Demo for the use of her dies and stamps.

Supplies:

Holiday Ornaments framelits dies (SU)
Chipped Sapphire Distress ink (Tim Holtz/Ranger)
Decorative Paper (DCWV)
White Cardstock
Rosette Die (Tim Holtz/Sizzix)
White crochet thread with silver threading (Lily)
Snowflake Brad Buddy (Hot Off the Press)
Silver Stickles

August 15, 2012

Ornament #4
Studio Fun

I wanted an ornament to hang in my studio because I knew I would give away the rest of my ornaments.  This ornament sure looks pretty in my studio!  This ornament is different than the last few I've posted and it ended up being larger.  Thank you to Pam, my SU Demo - one of these days I'll need to give her back her stamp set and dies!


Supplies:
Holiday Ornaments framelits dies (SU)
Ornament Keepsakes stamp set (SU)
White Cardstock
Purple ink pad (Marvy)
Green Galore in pad (SU)
Firefily Stickles (Ranger)
Rosette Die (Tim Holtz/Sizzix)
White crochet thread with gold threading (Lily)
Rhinestone (Michael's)

August 14, 2012

Ornament #3
Country Christmas

I wanted an ornament with what I refer to as a "log cabin" look or an old fashioned country Christmas look.  I didn't use any stamps for this ornament, just decorative paper.  It saved die cutting time, but I ended up inking the edges of the paper (I have this thing about the white exposed edge on paper!) and I also inked the outer edges on the back of the ornaments for better blending when I assembled my ornament.  So far, this is one of my favorite color combos!  Thank you again to Pam, my SU Demo, who also has a new grandson to spoil!  Welcome to the world baby Ryan!


Supplies:
Holiday Ornaments framelits dies (SU)
Decorative Paper (DCWV & Cloud 9 Designs)
Fired Brick Distress Ink (Tim Holtz/Ranger)
1/2" Satin Ribbon (Offray)
Gold Crochet Thread with gold threading (Lily)
Rosette Die (Tim Holtz/Sizzix)
Frosted Lace Stickles (Ranger)
Burgundy Stickles (Ranger)

August 13, 2012

Ornament #2
Red & White

For this ornament I used only red ink, mostly because I avoid green in ornaments on my Christmas tree.  I am very thankful to my SU Demo, Pam, for the use of her stamp set, framelits dies and rosette die!  She's great about letting me borrow stuff to play with before I buy it myself!


Supplies:
Ornament Keepsakes stamp set (SU)
Holiday Ornaments framelits dies (SU)
White Cardstock
Real Red ink pad (SU)
1/2" Sheer white ribbon (JoAnn's)
Rosette Die (Tim Holtz/Sizzix)
Gold Stickles (Ranger)
White Button (Streamline)
White Crochet Thread with Gold Thread (Lily)

August 12, 2012

Ornament #1
Traditional

I'm having so much fun!  This is the first ornament I made using Stampin' Up's new ornament framelits and matching stamp set.  Thank you to my SU Demo, Pam for letting me play with these new items.  Thank you also to Dani Dziama for her great tutorial (the link for her tutorial is below).


Click HERE for Dani's tutorial.

Supplies:
Holiday Ornament framelits dies (SU)
Ornament Keepsakes stamp set (SU)
White Cardstock
Garden Green & Real Red Ink Pads (SU)
1/2" Picot-Edge Satin Ribbon (Offray)
White Crochet Thread with Gold Thread (Lily)
Medalion (unknown, painted gold with Tester Model Paint)
Rhinestone (Michael's)
Punch for Rosette (Martha Stewart)
Glitter (Martha Stewart)

August 4, 2012

Crayon Memory Box #2

This box was made for Ryan's 2 year old cousin, Andrew, who loves tractors and dirt!  Again, the original design is by Laura Denison of Following the Paper Trail.


August 3, 2012

Crayon Memory Box #1

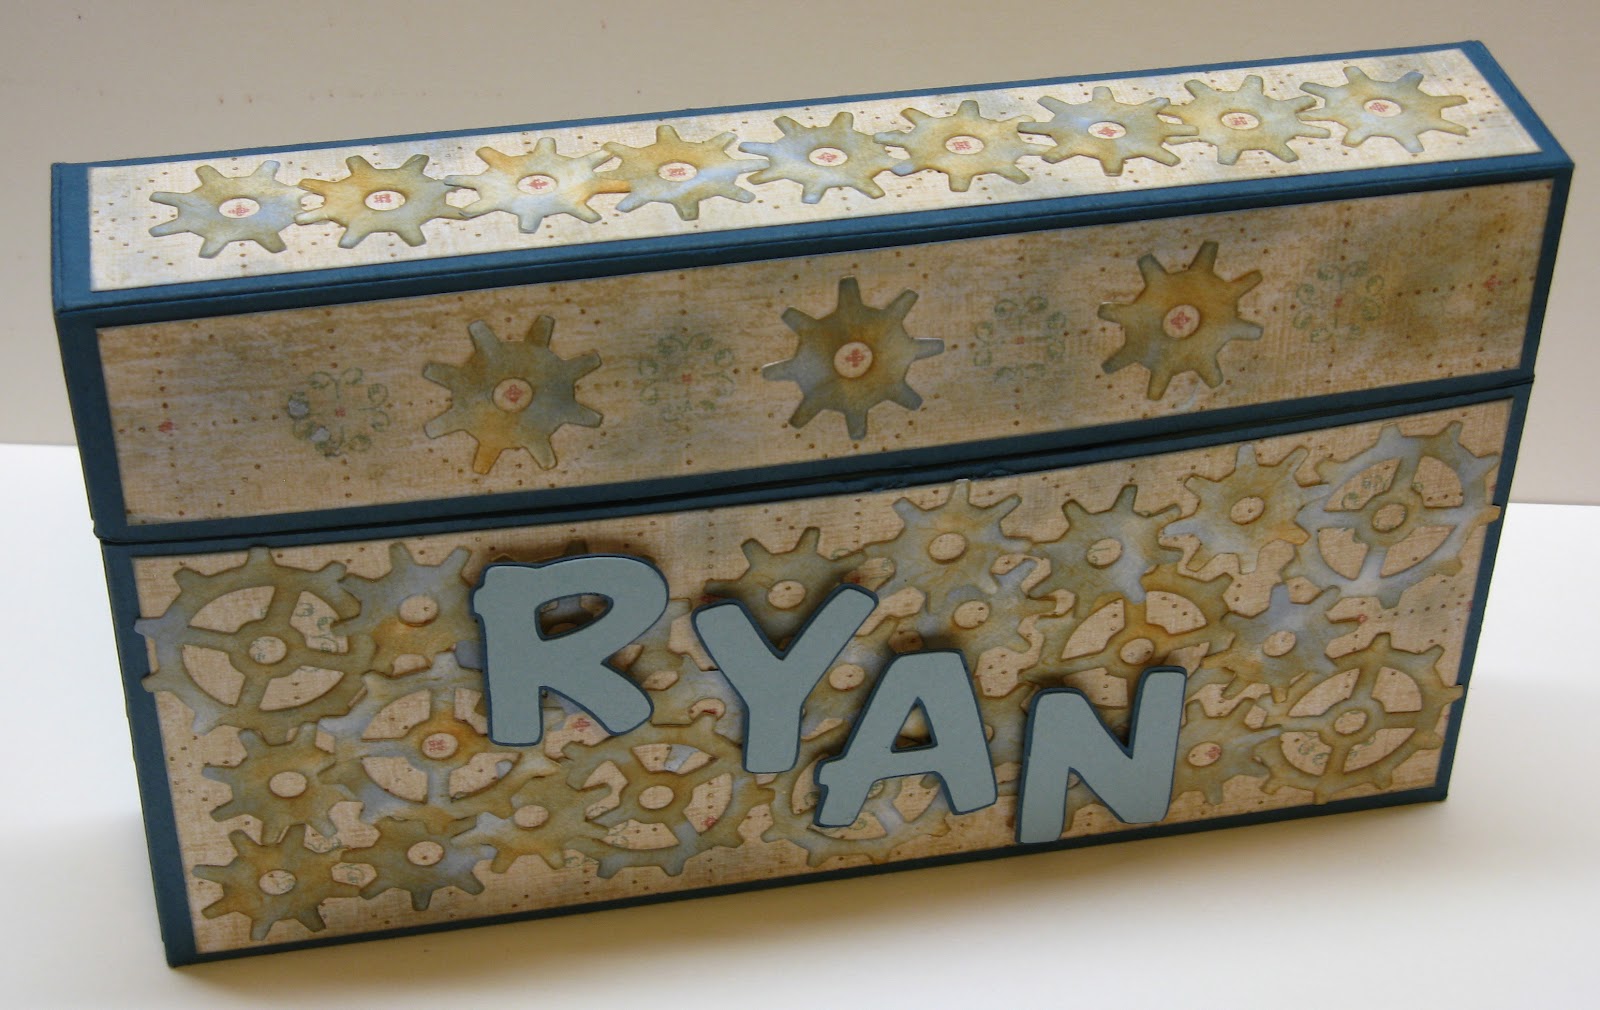
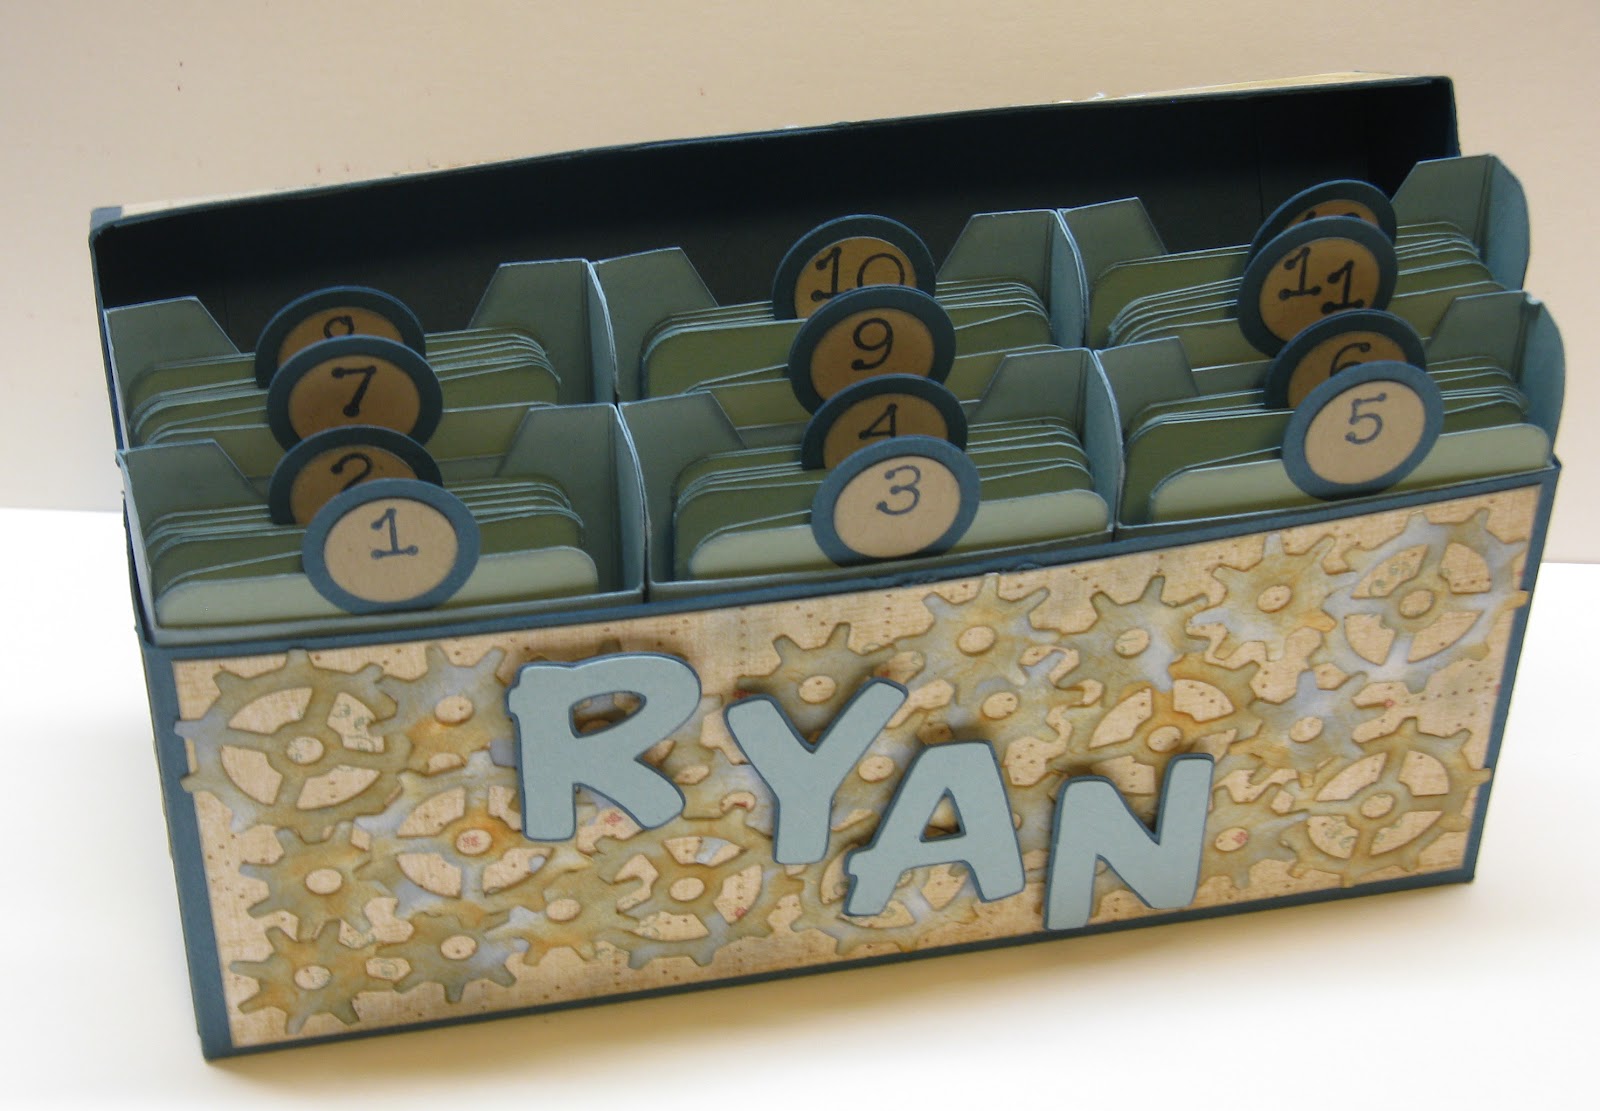
This project accompanied the giraffe baby card in yesterday's post.  The original design is by Laura Denison at Following the Paper Trail.  This box is just like a box of 64 Crayola crayons!  This one is made with 12 inserts so Ryan's mom can add photos and memories from Ryan's first year.  I also gave Ryan's mom a bunch of matching photo mats and pre-stamped sentiments to add to the inserts.


Due to UStream's limit on video storage for broadcasters, many Ustream videos were erased by Ustream, and I am unable to find the link to Laura's Crayon Memory Box video.

June 29, 2012

Alcohol Ink + Bike Helmet

How does that saying go?

If it doesn't move, paint it!

My husband recently purchased a new bike helmet for me because I refuse to ride without one. This helmet was plain white with a black visor.  I purposely chose a plain helmet because I was thinking: ALCOHOL INK! 

Since there is nothing, and I do mean nothing, fashionable about this necessary safety item, I painted my helmet with Silver and Sailboat Blue and the visor in just Silver alcohol ink (Ranger).  It now matches my bike and is one-of-a-kind!

The best thing is that the silver reflects light so I'll be much more visible at sundown!


April 27, 2012

What I've Been Up To!

I know it has been a very long while since I've posted anything - I've been busy with 27 mini albums for the church girls (all Laura Denison's Lacy Flaps pattern and lots of punching!), making stuff for fun, and just playing in my studio!

This is a sample of my 2012 Christmas Ornaments (this one is mine!).  Below the wreath is a link to the YouTube video tutorial on how to create these fun wreaths! 

Click here for the YouTube video tutorial for the wreaths.

I've made two different sized wreaths, all made with simple colored copy paper, and this particular wreath is made with 18 pieces of 3" x 3" paper. I also used silver stickles, a bead, crochet thread for the hanger, and I colored the sheer ribbon with some spray from Lindy's Stamp Gang line of products and used a different shade for the wreath.

Besides lots of wreaths, I've completed lots and lots of cards for birthdays, anniversaries and holidays.  Gary is still busy with his college classes and has finals next week.  He's doing very well and I am proud of all his effort! 

Spring has finally arrived in Montana (I think!), so the week after Gary's finals means the start of yard work, and dogs to groom and something tells me not near as much time in my studio!

March 6, 2012

CD Envelope

I mentioned earlier that I was making a CD of photos for my step-daughter, Amy.  Amy is such a blessing in my life so I thought I would make a nice envelope for the CD.  Below is the finished envelope.  I used Dawn Griffith's pattern for inspiration, but I altered it slightly to include a flap to close the envelope.  Thanks Dawn!


March 5, 2012

Envelopes
Martha Stewart Scoreboard

I recently put together some very thick cards for our 13 grandkids and discovered afterwards that the cards did not fit in a standard A2 envelope!  I didn't like the finished sizes of the envelopes provided on the triangle, so I experimented with my Martha Stewart scoreboard for a thick A2 envelope, a 6" square envelope, a 3" square envelope, and a gift card envelope.  This is what I came up with:

Envelope - Thick A2 Card:
Cut paper 8-1/2" x 8-1/2"
Score sides A & C at 3"
Score sides B & D at 3-3/4"

Envelope - 6" Square Card:
Cut paper to 9-3/4" x 9-3/4"
Score all sides at 3-3/4"

Envelope - 3" Square Card:
Cut paper to 5-1/2" x 5-1/2"
Score all sides at 2-1/4"

Envelope - Gift Card:
Cut paper to 4-5/8" x 4-5/8"
Score sides A & C at 1-1/2"
Score sides B & D at 2-1/8"